User Interface
SketchUp toolbar
Section titled “SketchUp toolbar”The Rayscaper toolbar in SketchUp gives you quick access to the render window and light creation tools.

| Button | Description |
|---|---|
| Render View | Opens the Rayscaper render window. |
| Point Light | Creates a point light in your scene. |
| Spot Light | Creates a spotlight in your scene. |
| Directional Light | Creates a directional light in your scene. |
| Area Light | Creates an area light in your scene. |
| Lock Camera | Stops camera sync with SketchUp. Use this to navigate your model while keeping the current render angle. |
| Match Viewport | Syncs the Rayscaper camera with SketchUp’s viewport and matches the render resolution to the SketchUp aspect ratio. |
| License Manager | Opens the license manager. |
| Rayscaper Help | Opens this documentation website. |
I lost my toolbar
Section titled “I lost my toolbar”If the toolbar isn’t visible after installing Rayscaper, go to View > Toolbars and enable it:
Render window
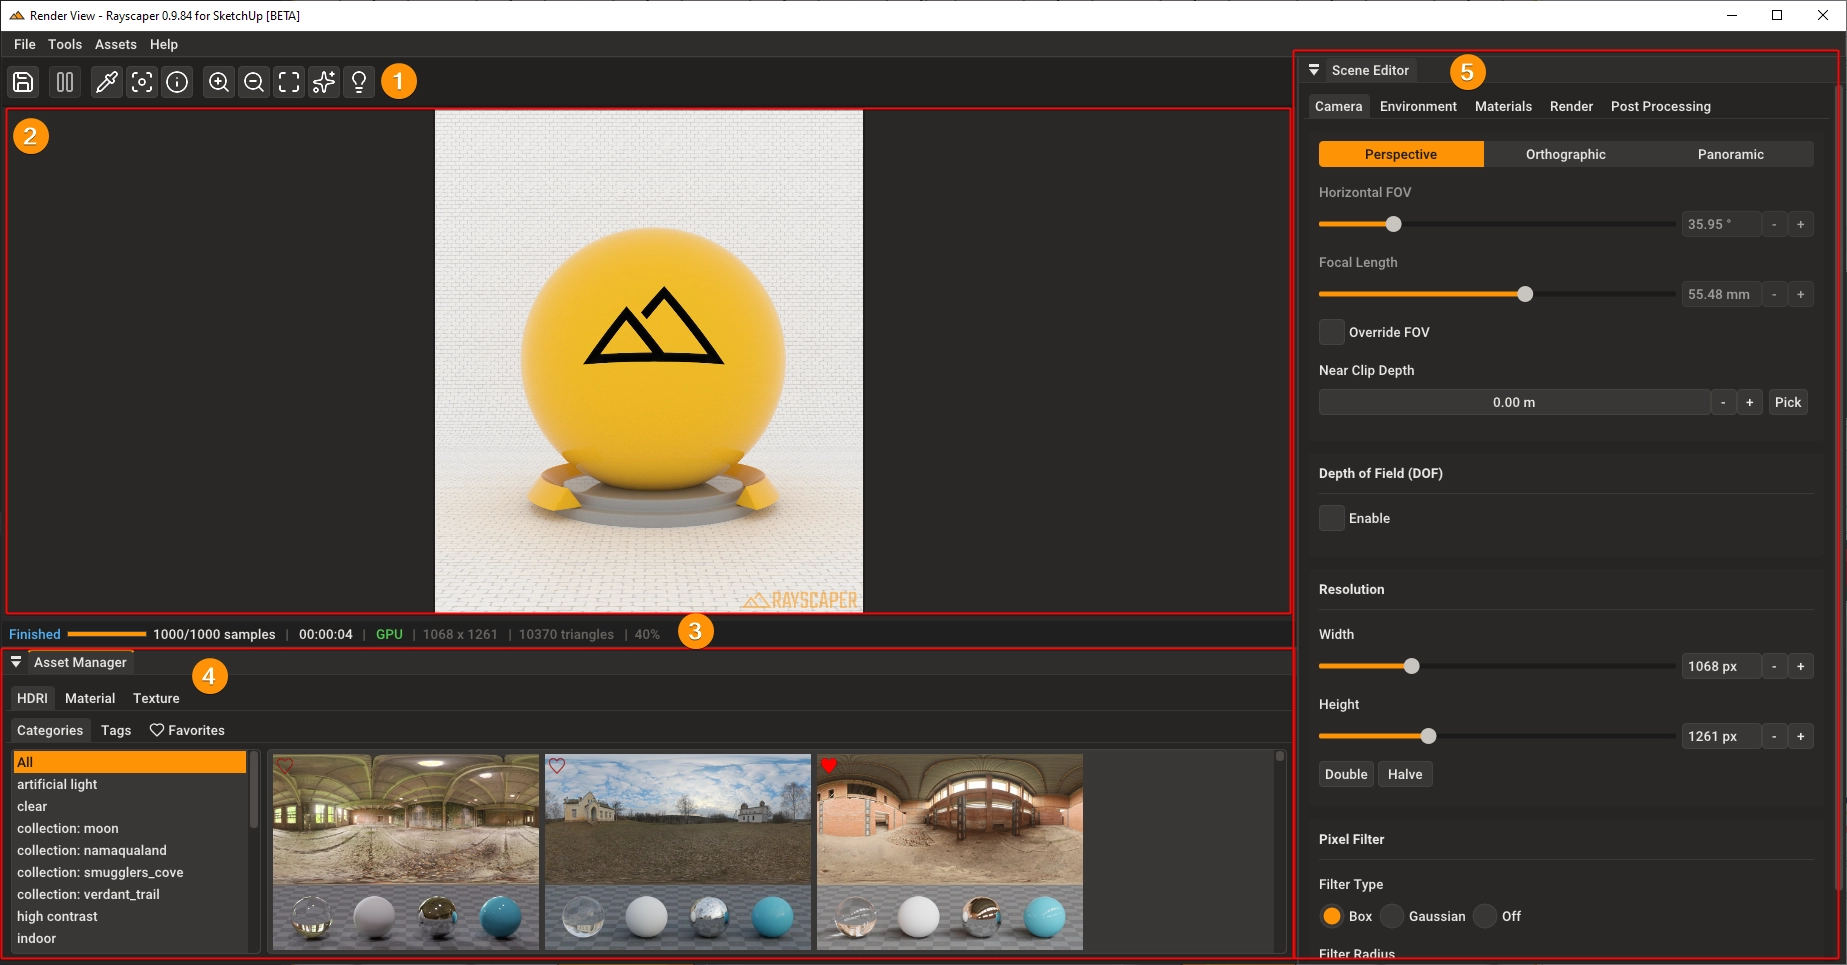
Section titled “Render window”The Rayscaper render window is where you view your render and adjust settings.
| # | Area | Description |
|---|---|---|
| 1 | Toolbar | Quick access to save, settings, and other common actions. |
| 2 | Viewport | Shows your render in real-time as you make changes. |
| 3 | Status Bar | Displays render progress, sample count, render time, resolution, and scene statistics. |
| 4 | Asset Manager | Browse HDRIs and textures. Drag assets directly into the viewport or material editor. Filter by category or tag. |
| 5 | Scene Editor | Adjust render settings across tabs: Camera, Environment, Lights, Materials, Render, and Tone Map. |