Environments
The environment is one of the most important elements in your renders. It controls two things:
- What you see behind your model - The background of your image
- How your scene is lit - Environment lighting illuminates your model and creates reflections on shiny surfaces
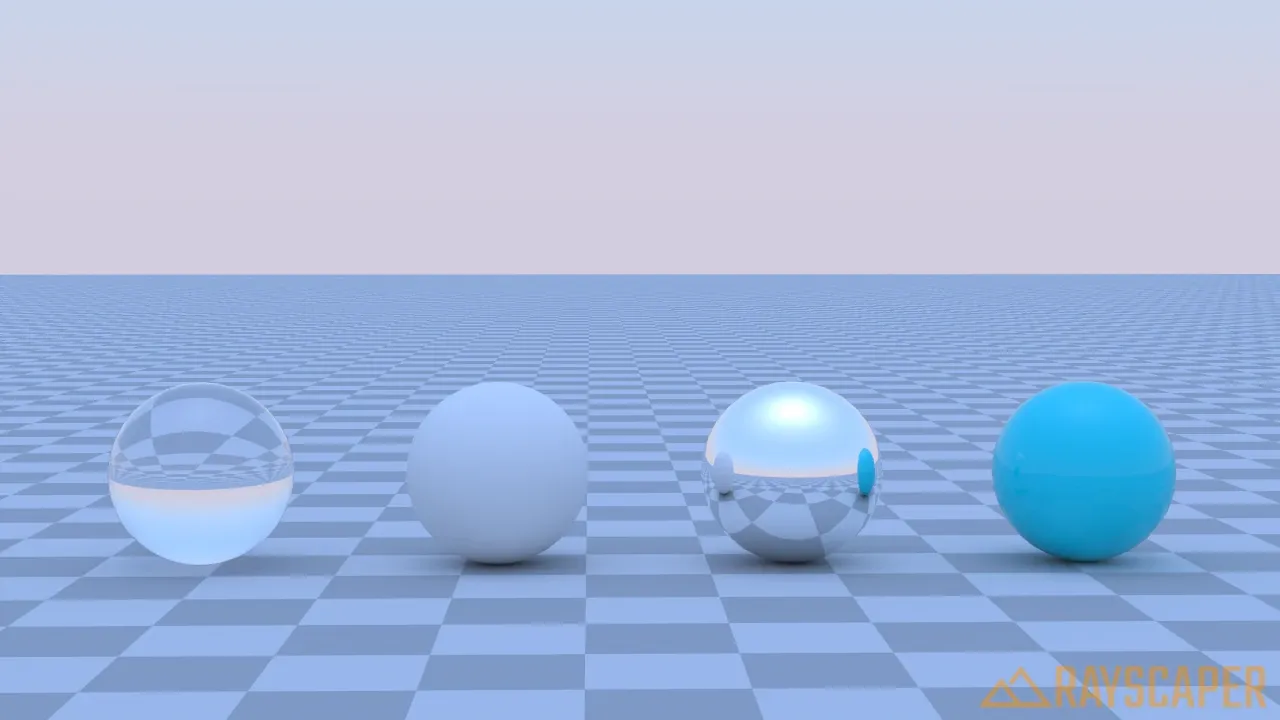
Think of the environment as an infinitely large sphere surrounding your entire scene (also called a sky dome or environment map in other software). Whatever image or color you set as the environment wraps around everything, providing both a backdrop and a light source.
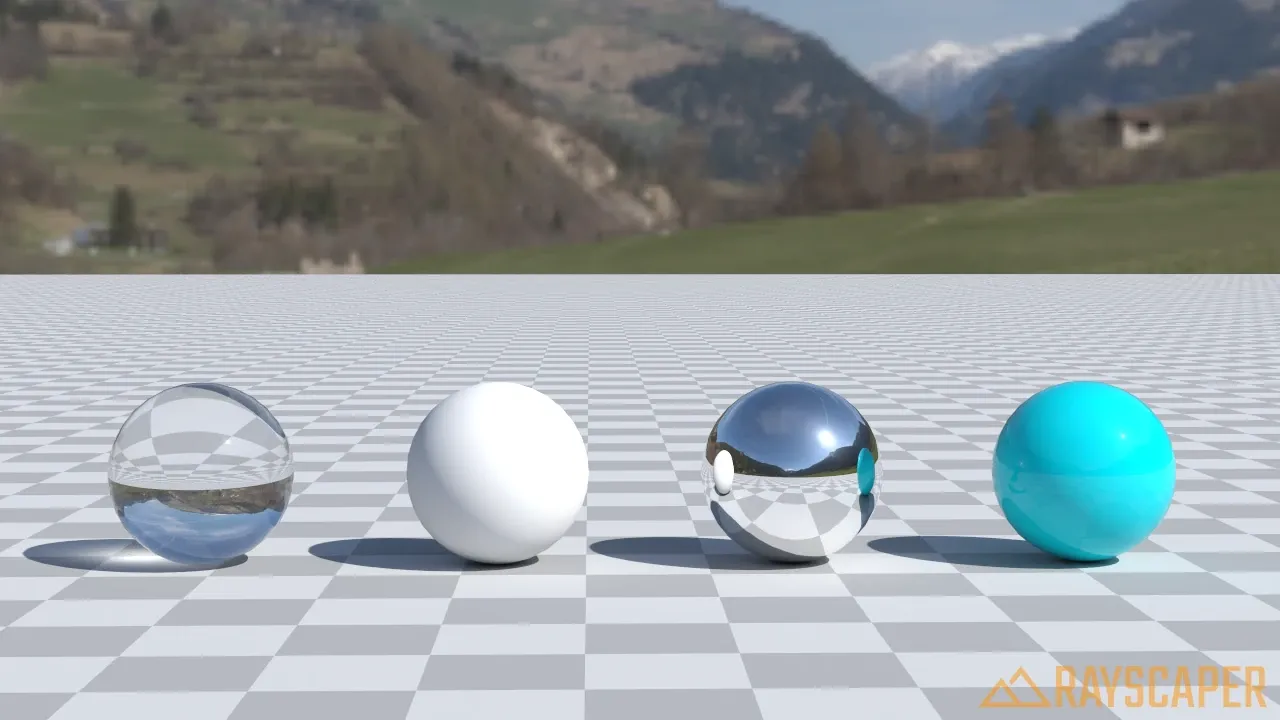
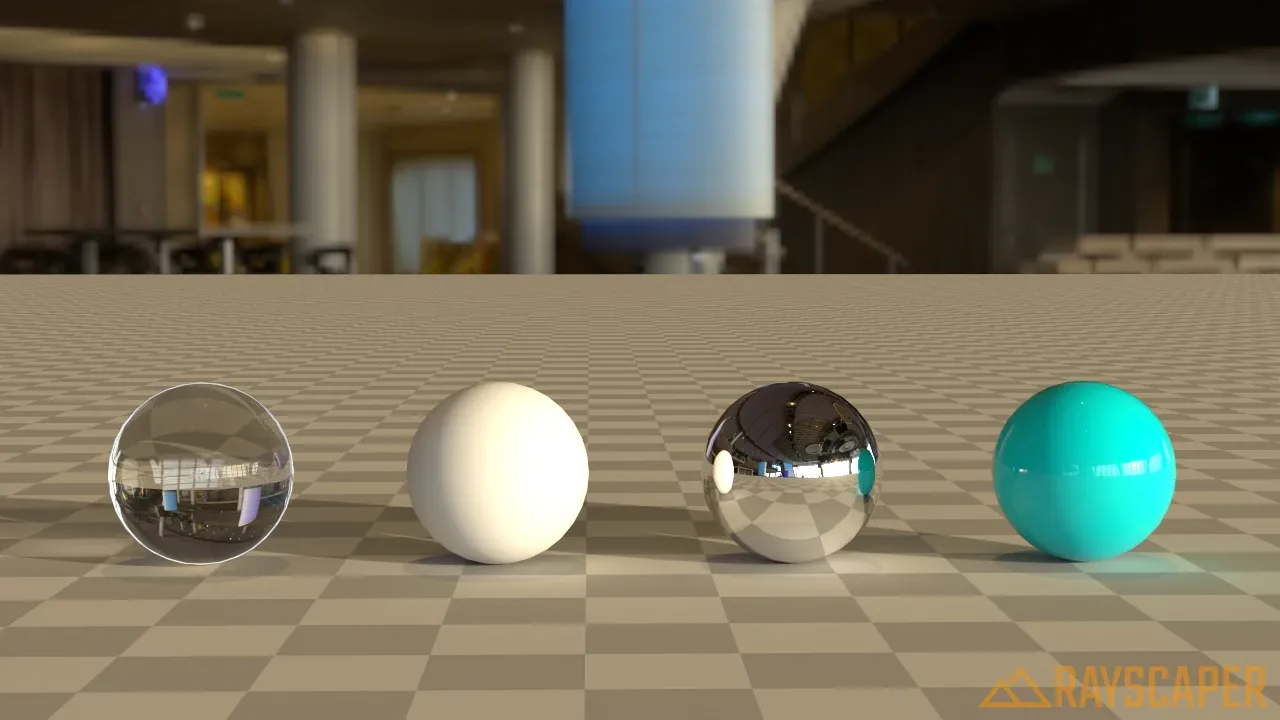
A scene lit by an HDRI environment. Notice how the environment provides both the background and realistic lighting with natural reflections.
Finding Environment Settings
Section titled “Finding Environment Settings”Open the Environment tab in the Rayscaper window to access all environment controls. The available options change depending on which environment type you select.
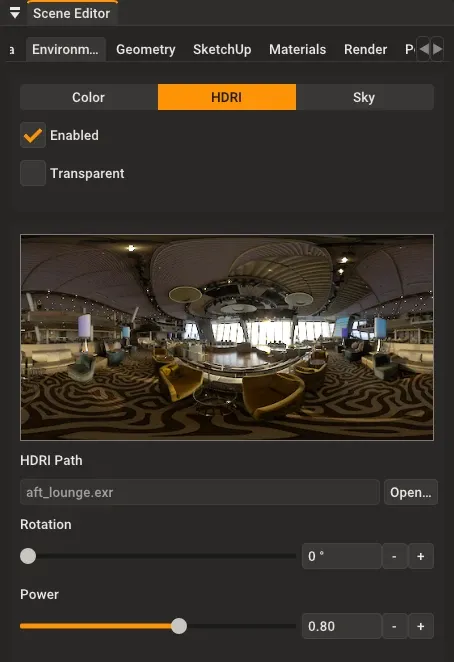
The Environment tab with HDRI selected.
Basic Controls
Section titled “Basic Controls”Before choosing an environment type, there are two important toggles that apply to all environments:
Enabled
Section titled “Enabled”Turns the environment on or off completely. When disabled:
- The background becomes pure black
- No environment lighting reaches your scene
- Only explicit lights (point lights, spotlights, etc.) illuminate your model
The environment provides background and lighting.
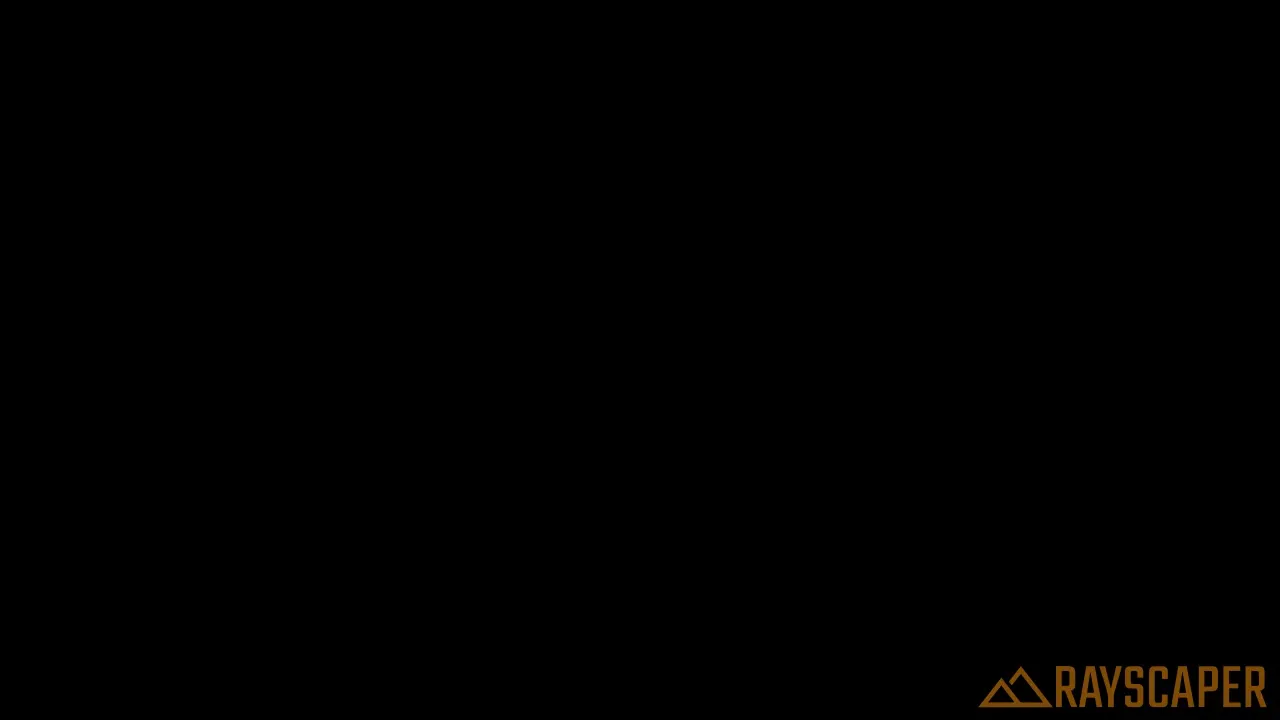
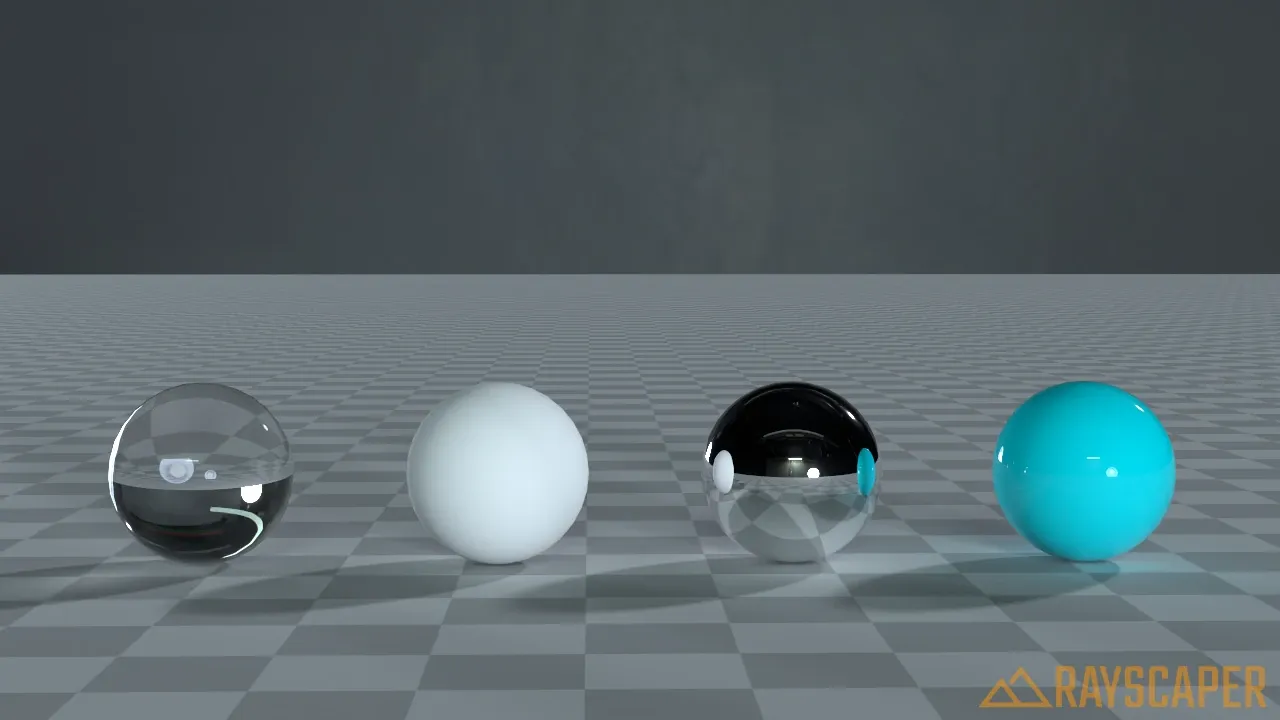
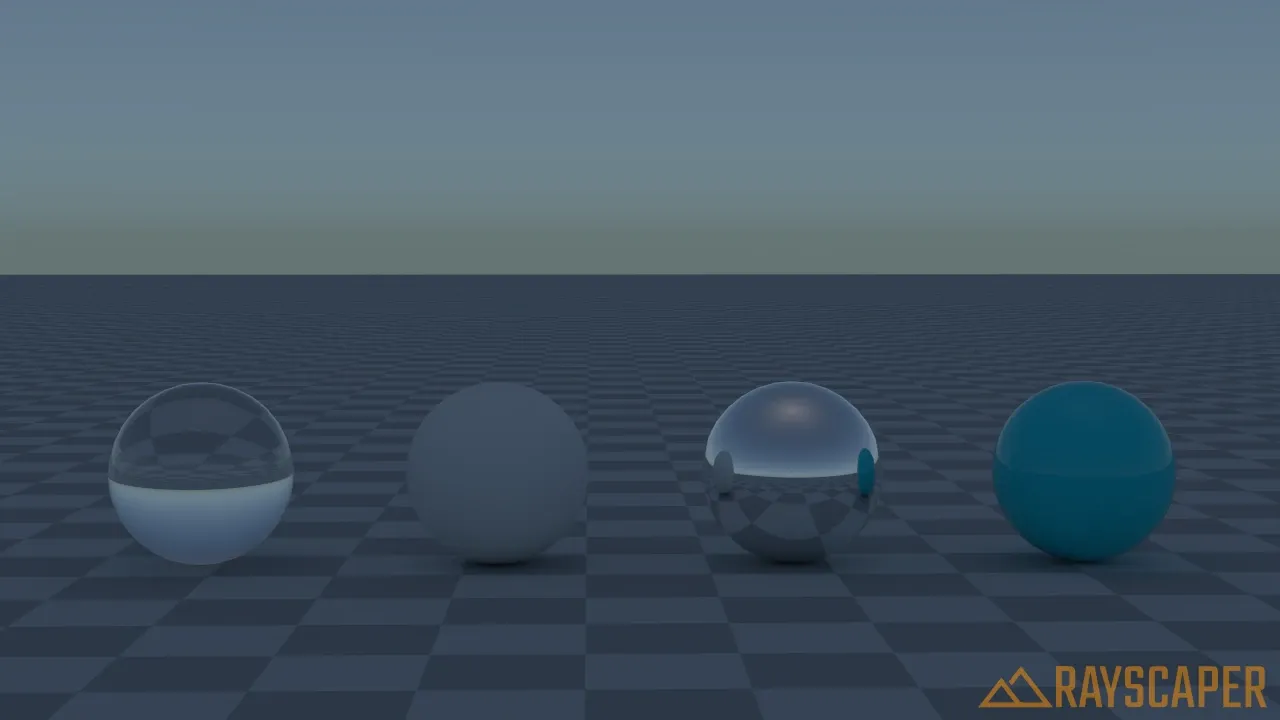
Black background, no environment lighting (only explicit lights work).
Transparent
Section titled “Transparent”Makes the background transparent while keeping the environment lighting. Your model is still lit by the environment, but the background becomes an alpha channel instead of showing the environment image.
The environment is visible behind the model.
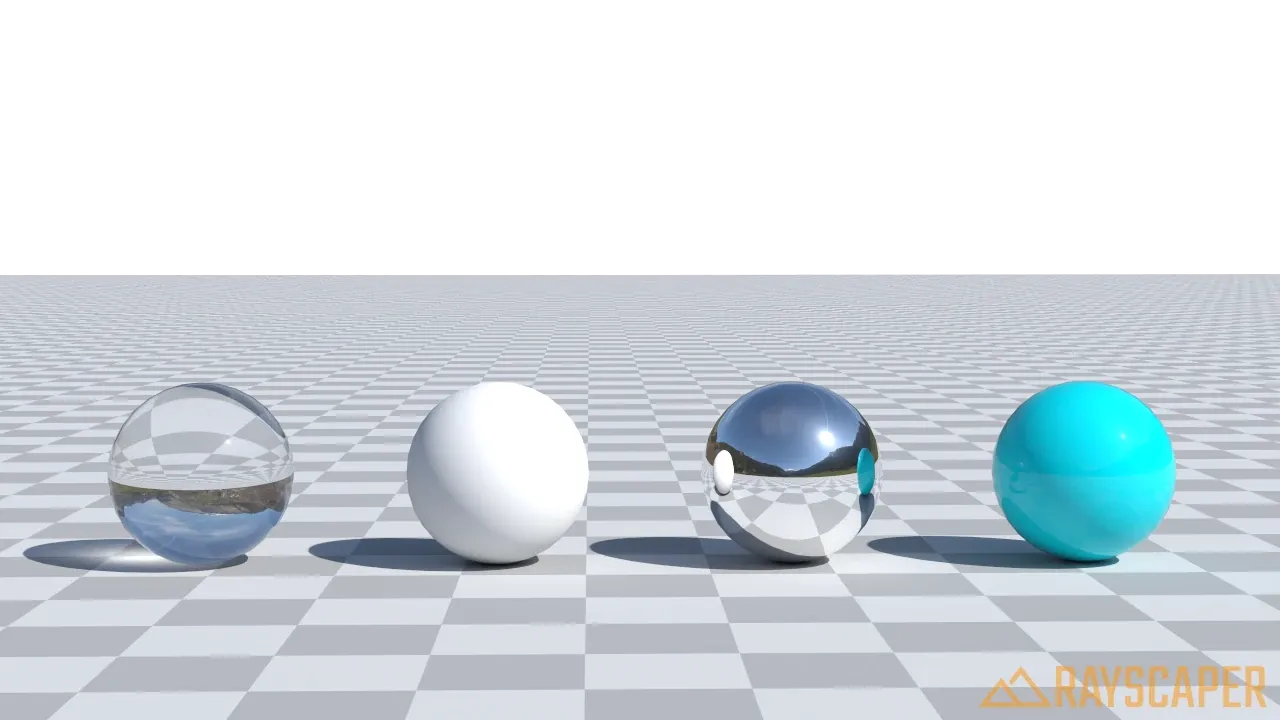
The background is transparent (shown as checkered in viewers that support it).
Environment Types
Section titled “Environment Types”Rayscaper offers three ways to create your environment: Color, HDRI, and Sky. Each serves different purposes and offers different levels of control.
Color Environment
Section titled “Color Environment”The simplest option - a solid color that fills the entire background. This creates perfectly uniform lighting from all directions.
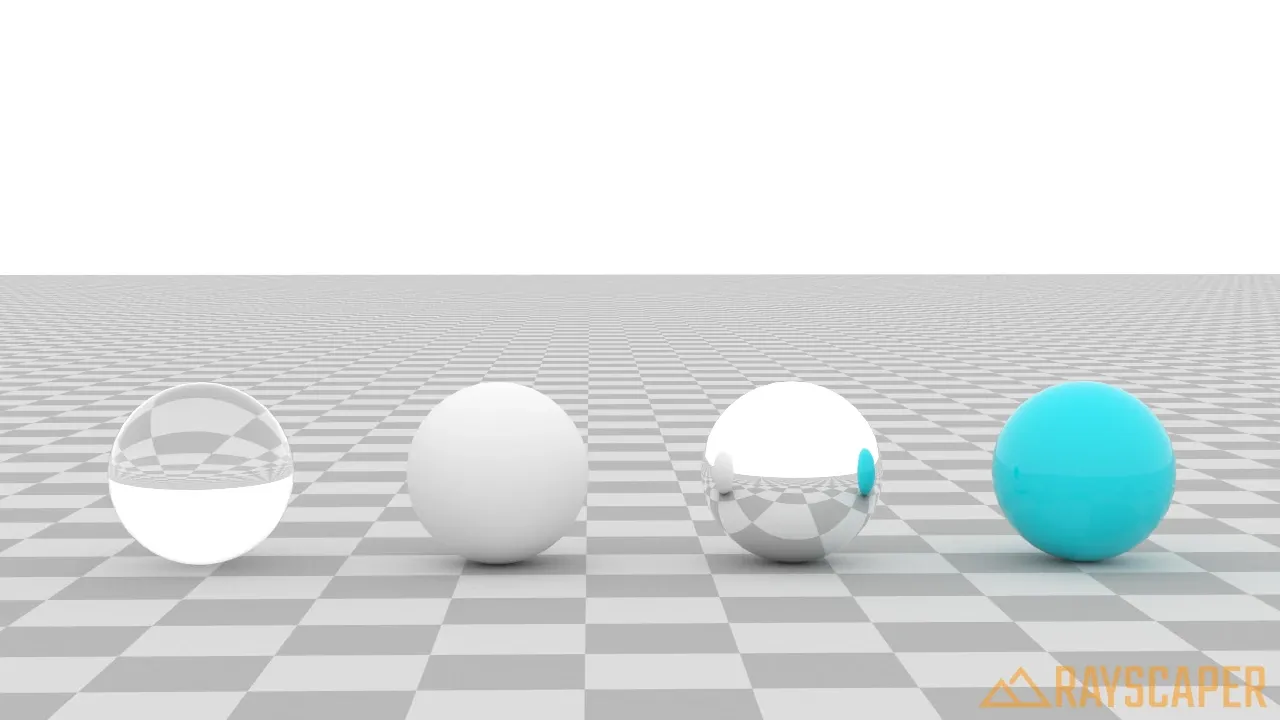
A white background - clean and professional for product shots.
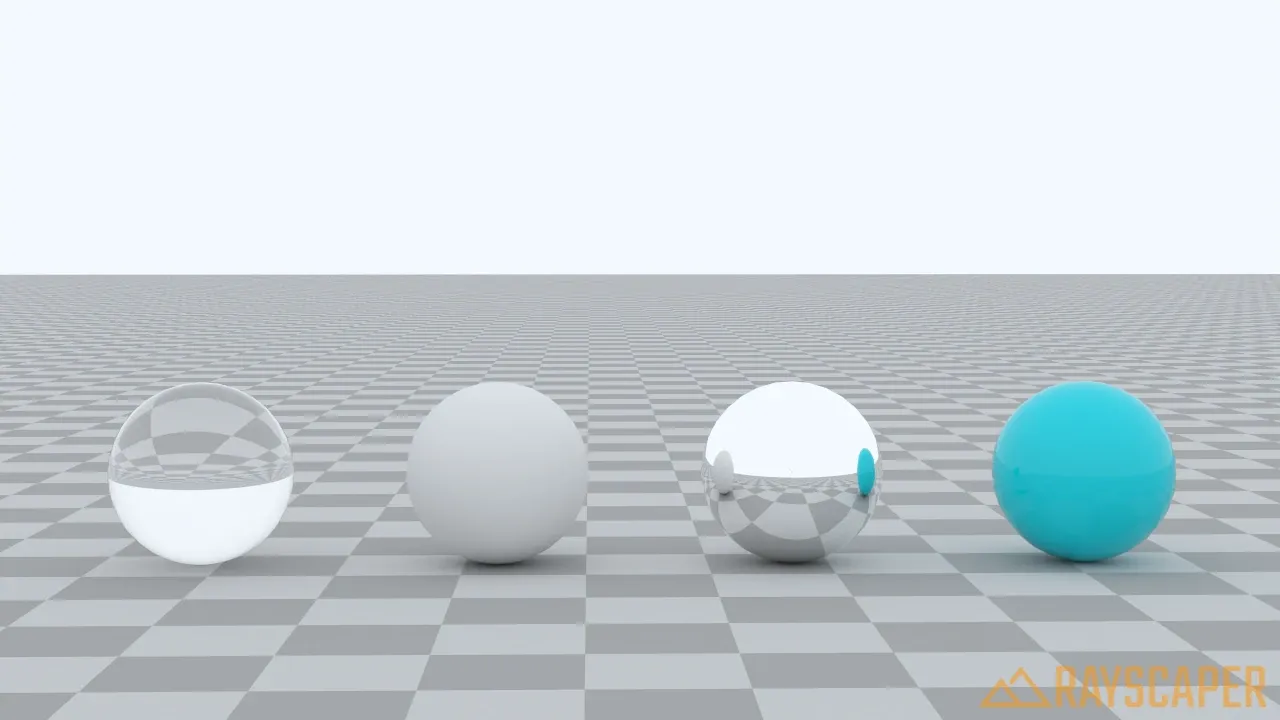
A light blue tint adds subtle color to the lighting.
Best for: Product photography, catalog images, clean studio-style renders, or when you want complete control over the background color.
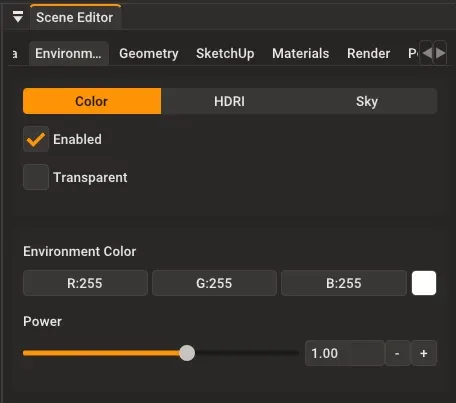
The Color environment settings.
Color Settings
Section titled “Color Settings”| Setting | Description |
|---|---|
| Environment Color | Click the color swatch to choose any background color. |
| Power | Controls brightness. Higher values make both the background and lighting brighter. Start with 1.0 and adjust as needed. |
HDRI Environment
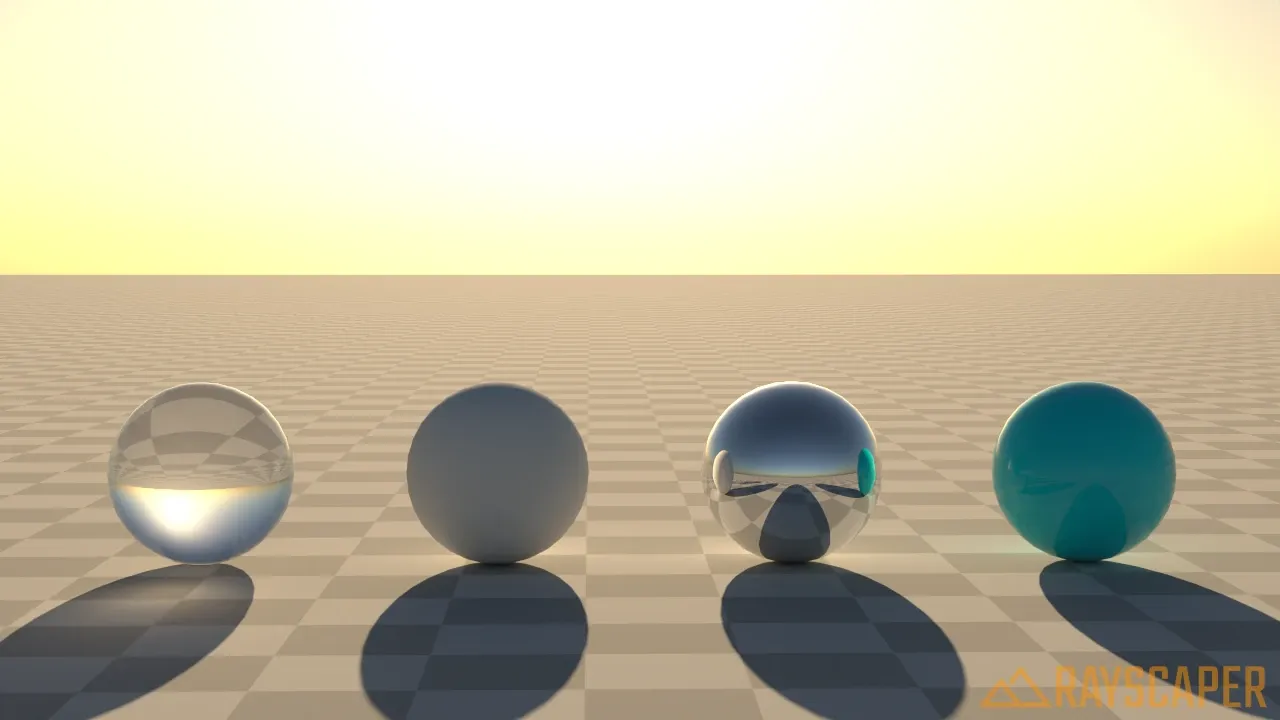
Section titled “HDRI Environment”HDRI (High Dynamic Range Image) environments use real photographs of the world to light your scene. Because these images capture actual lighting conditions - including the sun, sky, buildings, and reflections - they produce incredibly realistic results with minimal effort.
An indoor HDRI creates warm, ambient interior lighting.
An outdoor HDRI provides natural daylight with sky reflections.
A studio HDRI with controlled lighting - perfect for product shots.
Best for: Architectural visualization, product renders that need to look “in context,” any scene where realism matters.
How to Use an HDRI
Section titled “How to Use an HDRI”- Select HDRI as the environment type
- Click Open… to browse for an HDR file
- Adjust rotation and power as needed
Rayscaper supports .hdr and .exr file formats - the standard formats for HDR images.
Where to Get HDRIs
Section titled “Where to Get HDRIs”Poly Haven and ambientCG offer hundreds of free, high-quality HDRIs covering everything from outdoor landscapes to indoor studios. All their HDRIs are CC0 (public domain), so you can use them in any project.
HDRI Settings
Section titled “HDRI Settings”| Setting | Description |
|---|---|
| Rotation | Rotates the HDRI around the vertical axis (0-360 degrees). Use this to position the sun or brightest area where you want it, or to change reflection angles. |
| Power | Scales brightness. If your scene is too bright or too dark, adjust this value. |
Sky Environment
Section titled “Sky Environment”Sky environments generate realistic atmospheric effects procedurally - no external image files needed. These are especially useful for outdoor architectural renders where you need a convincing sky that matches your lighting.
Midday sun with clear blue sky.
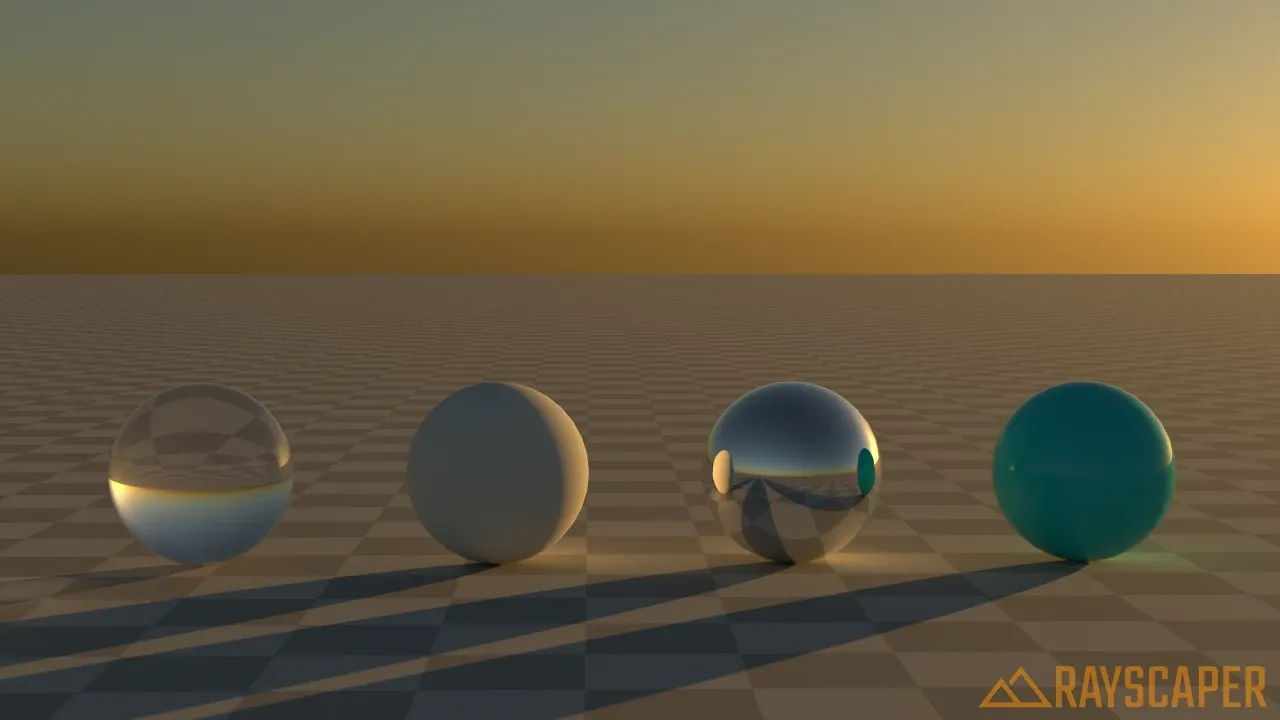
Low sun creates warm, golden lighting.
Accurate sky colors, especially near the horizon.
Fast and simple sky for quick previews.
Best for: Outdoor scenes, architectural visualization, any render where you need precise control over sun position and sky appearance.
Sky Models Explained
Section titled “Sky Models Explained”Rayscaper offers three procedural sky models, each with different features and use cases.
Preetham
Section titled “Preetham”The simplest and fastest sky model. It produces a reasonable sky color based on sun position and atmospheric haze, but lacks some of the subtlety of the more advanced models.
When to use: Quick previews, when render speed matters more than sky accuracy, or for stylized/non-photorealistic renders.
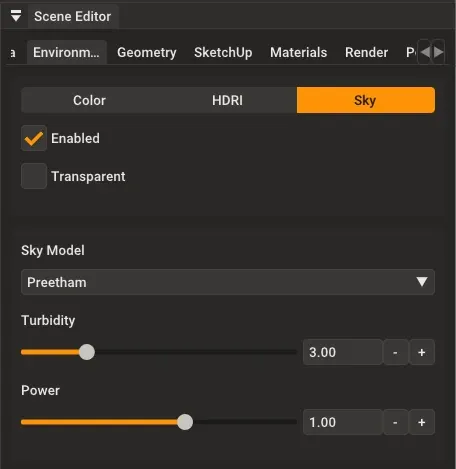
Preetham has minimal settings - just turbidity and power.
| Setting | Description |
|---|---|
| Turbidity | Atmospheric haze from 1 (crystal clear) to 10 (very hazy). Low values give deep blue skies; high values create washed-out, milky skies. |
| Power | Overall brightness multiplier. |
Hosek/Wilkie
Section titled “Hosek/Wilkie”An improved sky model that’s more physically accurate than Preetham, especially for colors near the horizon. It accounts for how light bounces off the ground back into the sky.
When to use: Most outdoor renders where you want a convincing sky but don’t need a visible sun disk.
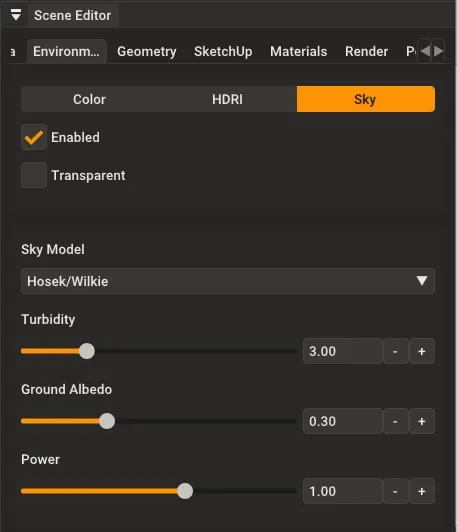
Hosek/Wilkie adds ground albedo for more accurate horizon colors.
| Setting | Description |
|---|---|
| Turbidity | Atmospheric haze (1-10). |
| Ground Albedo | How reflective the ground is (0-1). This affects sky color near the horizon - a bright ground (like snow) reflects more light back up, brightening the lower sky. |
| Power | Overall brightness multiplier. |
Nishita
Section titled “Nishita”The most physically accurate sky model, featuring a visible sun disk. It simulates how sunlight scatters through Earth’s atmosphere, including effects from air molecules (Rayleigh scattering), dust particles (Mie scattering), and ozone absorption.
When to use: Realistic outdoor renders, golden hour/sunset scenes, whenever you need a visible sun in the sky.
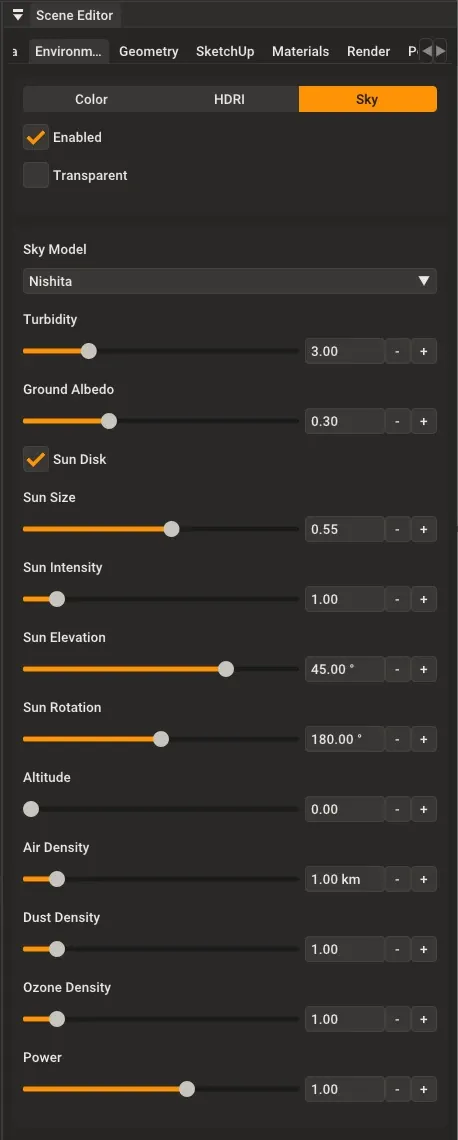
The Nishita sky model has the most options, giving you full control over the sun and atmosphere.
Nishita Settings
Section titled “Nishita Settings”| Setting | Description |
|---|---|
| Turbidity | Atmospheric haze (1-10). Lower = clearer. |
| Ground Albedo | Ground reflectivity (0-1). Affects horizon colors. |
| Sun Disk | Toggle visibility of the sun in the sky. |
| Sun Size | Angular diameter in degrees. The real sun is about 0.53 degrees. Larger values create a bigger, softer sun disk. |
| Sun Intensity | Brightness of the sun disk specifically. |
| Sun Elevation | Height above horizon (-90 degrees to +90 degrees). 0 degrees = sunrise/sunset, 90 degrees = noon. |
| Sun Rotation | Compass direction (0-360 degrees). Controls where the sun appears on the horizon. |
| Altitude | Simulated camera altitude in kilometers. Higher altitudes = darker, more saturated sky (like being on a mountain). |
| Air Density | Controls blue color intensity (Rayleigh scattering). Lower values = less blue. |
| Dust Density | Controls haze near horizon (Mie scattering). Lower values = clearer horizon. |
| Ozone Density | Controls subtle blue/purple shifts. Usually leave at 1.0. |
| Power | Overall brightness multiplier. |
Syncing with SketchUp Sun
Section titled “Syncing with SketchUp Sun”If you’re working on an architectural project where the sun position matters, you can have Rayscaper’s Nishita sky automatically follow SketchUp’s sun position. This is especially useful when:
- You’ve already set up shadows in SketchUp for a specific time of day
- You want to quickly compare different sun positions using SketchUp’s shadow settings
- You need the rendered sun to match SketchUp’s shadow studies
To enable SketchUp sun tracking:
- Go to Extensions > Rayscaper > Use SketchUp Sun for Nishita Sky
- The Nishita sky’s sun will now follow SketchUp’s shadow settings
Adjusting SketchUp’s shadow time automatically updates the Nishita sky’s sun position in real-time.
When tracking is enabled, you’ll see a checkmark indicator in the Environment editor, and the Sun Elevation and Sun Rotation sliders will be disabled (since they’re controlled by SketchUp).
Practical Tips
Section titled “Practical Tips”Choosing the Right Environment Type
Section titled “Choosing the Right Environment Type”| Scenario | Recommended Environment |
|---|---|
| Product shots on clean background | Color (white or light gray) |
| Architectural exterior with realistic sky | Nishita Sky |
| Quick outdoor previews | Preetham or Hosek/Wilkie Sky |
| Interior scenes | HDRI (choose one matching your window lighting) |
| Highly realistic renders | HDRI (real-world lighting is hard to beat) |
| Compositing onto custom background | Any environment + Transparent enabled |
Common Workflows
Section titled “Common Workflows”Product Photography Style:
- Use Color environment with white
- Set Power to 1.0-1.5 for bright, even lighting
- Enable Transparent if you need to composite later
Outdoor Architecture:
- Use Nishita Sky for maximum realism
- Set Sun Elevation to match your desired time of day
- Adjust Sun Rotation to control shadow direction
- Fine-tune Turbidity for sky clarity
Interior Scenes:
- Use an HDRI that matches what would be visible through windows
- Consider “overcast” or “cloudy” HDRIs for softer lighting
- Adjust Power so the environment doesn’t overpower your interior lights